Adobe Photoshop Tutorials, Tips and Tricks
|
||||||||||||
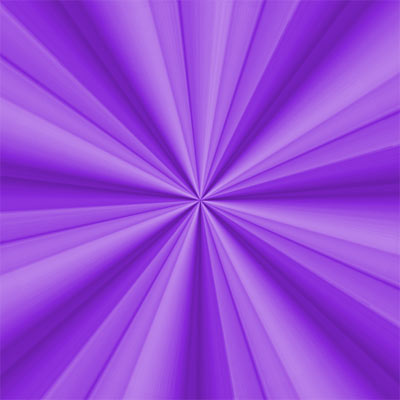
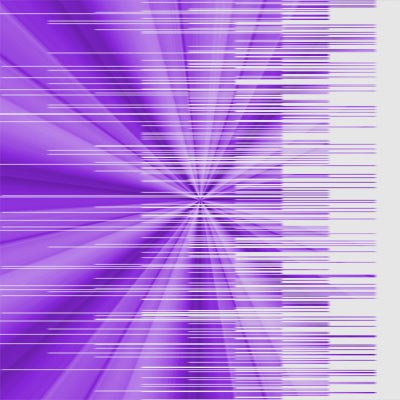
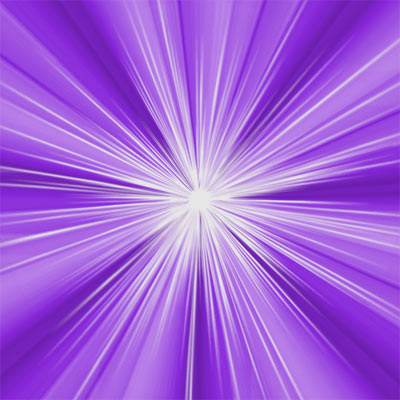
Create a Light Burst BackgroundHere's a fun and easy way to make dramatic light burst style backgrounds. These can be placed behind artwork, digital photos, used as desktop backgrounds and so forth. Here's a look at the final product:
This tutorial has quite a few steps, but don't let that deter you from trying it. All the steps are easy and don't require any special skills other than basic knowledge of the Photoshop tools. No drawing skills are needed since we're going to let Photoshop do the work for us!
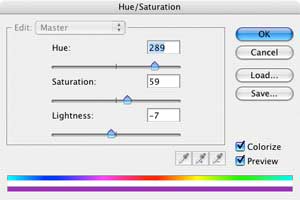
|
| |||||||||||
1Start with an empty canvas. I chose 600 by 600 pixels for this example. You can use a different size, but keep it square since we will be doing a rotation later that's easier if the canvas is square. There are a number of different ways to get started with this effect and I'll show you two.
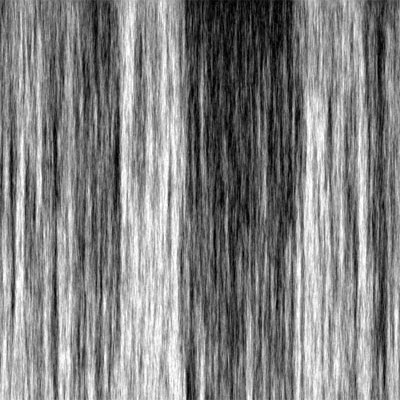
Option 2: This other approach is a little more work, but it gives you more control over the final result. Hit the "d" key to set the default foreground and background colors to black and white, then choose Filters->Render->Clouds. After this, choose Filters->Render->Fibers. You can choose any values at all for the Variance and Strength parameters which will vary the look of your light burst pattern. I used 10 for both values and got this:
Weird way to get started with a light burst effect, isn't it? Don't worry though. With a little experimentation, you'll get the hang of how changing your starting image here will effect the final outcome. Using the fibers you get more light "rays" in the final result over using the built-in pattern. Also, instead of using black and white when rendering the clouds, you can use any two shades of gray. This will alter the contrast in the final result. For the remainder of the tutorial I'll be using the pattern generated in option 1 since it's easier to do. Don't worry about color at this point, we'll add that later. 2Now we'll get the light burst effect going by choosing Filter->Distort->Polar Coordinates. Select the Rectangular to Polar option and click OK. Your image will look like this now:
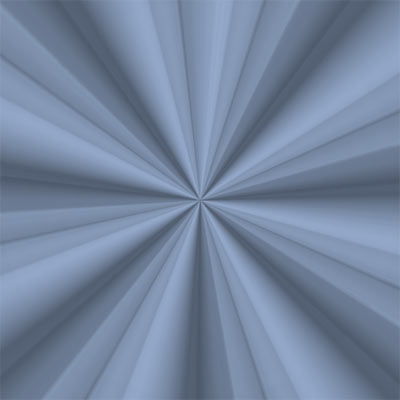
Here we can see the light rays emerging around the edges. 3Next we'll get rid of the circular pattern in the middle and just leave the light rays that appear to be coming from the center of the image. Chose Filter->Distort->Spherize and set the Amount to -100% and Mode to Normal. You'll notice that this has the effect of shrinking the center image. Hit cmd-F to reapply the filter again (control-F on Windows) and the center image will shrink further. Keep hitting cmd-F until the circular pattern in the center completely disappears and you're left with just the light burst rays. It should look like this now:
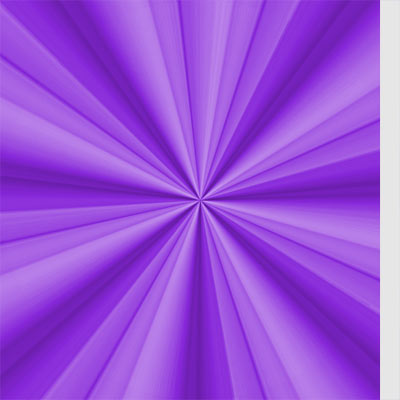
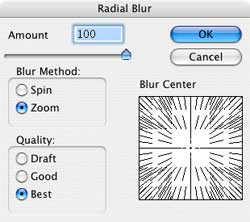
4This step is optional. If you want the rays to have a more pronounced look, you can sharpen the image at this point. Try Filter->Sharpen->Smart Sharpen with a Radius around 4 and an amount around 60 for starters. Conversely, if you want a more subdued look, you can blur the image with Filter->Blur->Gaussian Blur. Choose whatever setting you like. You can also increase or decrease the contrast between the light and dark rays with either Image->Adjustments->Levels or Image->Adjustments->Brightness/Contrast. For my example here, I chose to apply the sharpening I mentioned above. My image now looks like this:
5
|
||||||||||||
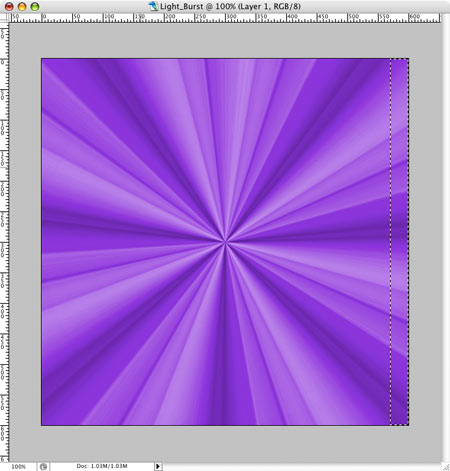
6Now we'll take it to the next level by adding a bright burst of light rays emanating from the center of the image. At this point, it helps to expand the size of the window so that it's slightly larger than the image. This gives you some extra room around the edges to use the tools more easily. We also have some options here that will influence how this brighter highlight will look. Either way, we need to work in a new layer, so click the new layer icon First, select the Rectangular Marquee Tool
7Now we need to fill this selection with paint. I prefer to use a neutral shade here and colorize it later to get the look I want. However, if you know what color you want, you can use it now. I chose a gray that's 90% of white (color #e6e6e6). Set your chosen color as the background color and hit cmd-Delete (control-Delete on Windows) to fill the selection. Then Deselect the selection with cmd-d (control-d on Windows).
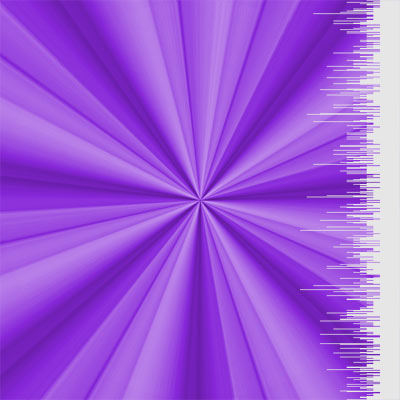
8Next we'll create what will eventually be beams of light radiating from the center of the image. Select Filter->Stylize->Wind and choose the Blast and From the Right options. We want to really stretch those lines out, so hit cmd-F (control-F on Windows) to reapply the filter a bunch of times. Keep hitting it until the filter no longer has any effect. The procedure we're doing here seems odd at first, but you'll see what will happen in a few steps.
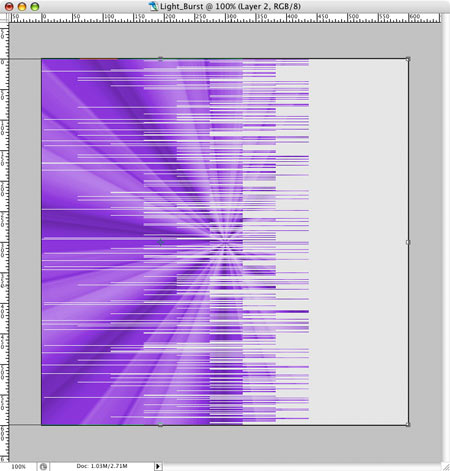
9We'll stretch the effect out even further using Edit->Free Transform. Grab the handle in the center of the left side and pull it far to the left. Keep going until some of the longest lines cross the left edge of the canvas like this:
10Stretching the image in the last step gave a band on the right that's probably larger than we want. The wider this area is, the bigger the white area will be in the center of the image when we get done. Making the band narrower will leave a smaller area of white in the center. This will make more sense after you see what the following steps will do. I'm going to narrow mine quite a bit by grabbing the handle in the center of the right side and dragging it right. I stopped when I had a band about 30 pixels wide like this:
Hit return to commit the transformation. 11The transformation we just did left some pixels in the layer that are beyond the edge of the canvas. We will want to get rid of these since they'll get in the way of the next steps. Select the Crop Tool |
|
|||||||||||
|
|
||||||||||||
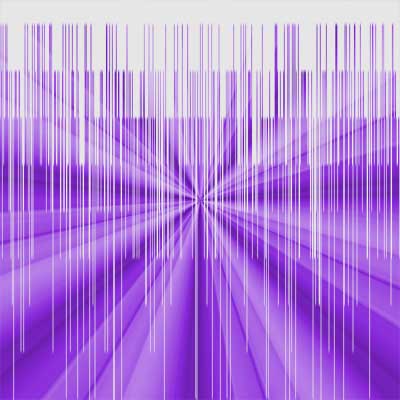
12To get ready for the next step, we first need to rotate this layer. So hit cmd-A (control-A on Windows) to Select All, then choose Edit->Transform->Rotate 90 CCW. Deselect when done (cmd-D on Mac, control-D on Windows). The reason we have to do the rotation here is that the Wind filter we used above only works from the sides, while the filter we'll use in the next step requires that things be oriented from top to bottom. Rotations and manipulations like this in Photoshop are not uncommon in order to get things set up for a particular filter or transformation you want. It's good to keep this in mind since it expands the power of the built-in tools.
13At this point, we finally have this ready to turn into a circular light burst pattern. We'll do that with the Polar Conversion filter. Choose Filter->Distort->Polar Coordinates and use Rectangular to Polar. What this filter does is to wrap the layer around the inside of a cone. The top edge ends up in the center and the bottom edge goes around the base of the cone in a circular pattern. That's why we had to rotate the image. We can also now see how the size of the band we had at the right side of the image back in Step 10 affects the amount of solid color in the center.
14
15
16
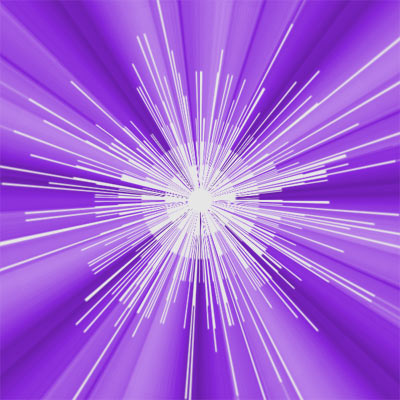
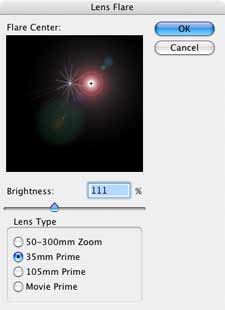
17Set the Blending Mode on the layer you created in Step 16 to Screen. In screen mode, anything that's black in the layer essentially becomes transparent. This causes the lens flare effect to overlay the rest of the image thusly:
There are all sorts of variations that can be done with this basic procedure. You can choose different patterns for the starting image which will change how the main light beams look. You can also vary the size and length of the highlights we added in Steps 6-14. And of course, you can try different colors. Experiment and have fun! |
||||||||||||
Thanks for visiting with the Photoshop Dragon.
Copyright © 2007-2010 Curt Schimmel. The contents of this web site may not be copied in any way without permission. Terms of Use and Privacy Policy. |