Adobe Photoshop Tutorials, Tips and Tricks
|
||||||||||||
Chrome Text and Frame EffectThe key to making any type of material look good in Photoshop is a combination of surface texture and lighting. For chrome, the surface is very smooth and shiny. So we need the shape and lighting to reflect that (pun intended!). The good news is that with the addition of Layer Styles in Photoshop several versions ago, chrome is now an easy effect to achieve. The effect works equally well on text and other objects. Here's what our final product will look like:
|
| |||||||||||
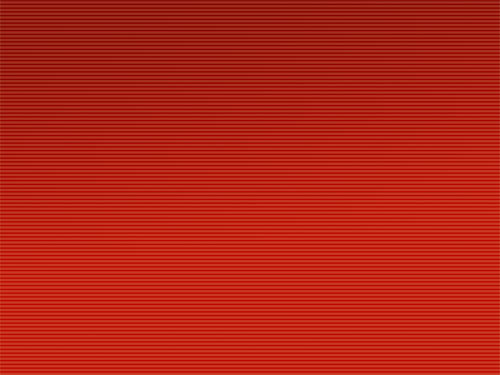
1We'll start with the textured background we created in the Lined Background Tutorial. You might want to follow that tutorial first and then come back here to add the text and chrome effect. The lined background will make a very nice reflection effect in the chrome as we shall see. Here's our starting point:
2Now we'll add our text. I wanted a blocky looking oblique font, so I picked Serpentine-Medium Oblique and set the font size to 200 points. Choose white for the color and enter the desired text. Don't worry if yours didn't come out perfectly centered. We'll fix that in a moment.
3The first part here is optional. I include it just to give you some ideas for the options you can consider when working on a project like this. I'd like my text to be a bit more angled than the font provides, so we'll fix that ourselves. We'll use the Distort transformation, but this transformation only works on pixel data, not text. So we first have to rasterize the text. Therefore, select Layer->Rasterize->Type. Then select Edit->Transform->Distort. Grab the middle handle on the upper edge and drag it a little ways to the right. I also raised it a little to increase the height just a bit as well. Stop when you get the look you want. Now let's get things nice and centered. Make sure the layer containing the text is still selected and choose the Move Tool Here's how mine ended up:
4Layer Styles will give us the chrome look we want. Let's begin with Layer->Styles->Bevel and Emboss. Use these settings:
You can raise or lower the Altitude to make your text more shiny or more dull looking. The color for the Shadow Mode should be a color that's a darker shade of your background color, but not black. Since I'm using a red background, I picked a dark red here (color #6f1d10). Using a dark color from the background helps create the illusion of the background being reflected on the text, which is important for the chrome look. |
||||||||||||
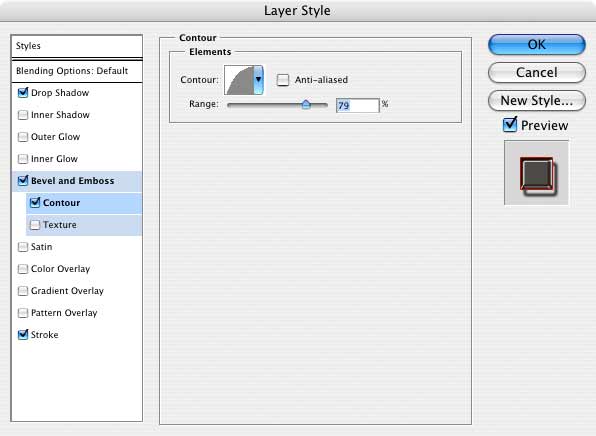
5Now we'll add a Contour effect. The effect this gives is a matter of taste, but I like the way it flattens out the metal. To me it seems more like real chrome lettering.
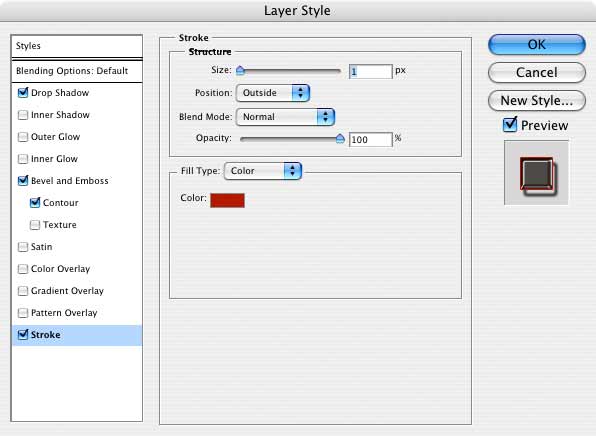
6The Stroke Effect is next. The effect is subtle, but it adds a little more red around the edges to reinforce the reflection. Use a color that's similar to your background for the color. I used #b10000. Here are the settings:
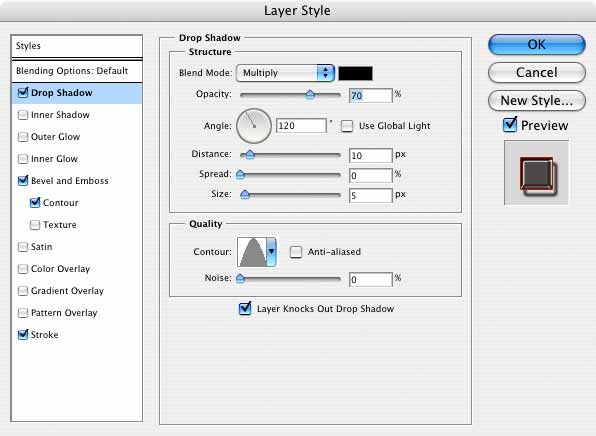
7Lastly, we'll add a Drop Shadow. This is an important aspect to the overall effect:
These settings create a sort of optical illusion. When you apply these, you'll notice that there appears to be a reflection of the background on the right side edges of the text. This is pure illusion, but it's very effective. What's happening is that the Contour setting is causing a gap in the effect that lets the background show through between the text and the drop shadow. This makes you think it's a reflection, even though it really isn't. The trick is to keep the Spread at zero and the Size small. This makes it seem like the shadow is at the base of the raised lettering. You can make the letters appear to be taller or shorter by changing the Distance setting. Here's what we have at this point:
8Let's plus this a bit further by adding a frame. We'll do this by using the Rounded Rectangle Tool
First create a New Layer above the layer containing the text. Now draw out a nice rectangle around the text to form a frame. Don't worry if it isn't centered; we'll fix that in a moment. Just get it to be the right size for the text. Since you're just drawing a path, you'll only see a very thin line. |
|
|||||||||||
|
|
||||||||||||
9
10Time to center it. Choose the Move Tool
|
||||||||||||
Thanks for visiting with the Photoshop Dragon.
Copyright © 2007-2010 Curt Schimmel. The contents of this web site may not be copied in any way without permission. Terms of Use and Privacy Policy. |