Adobe Photoshop Tutorials, Tips and Tricks
|
||||||||||||
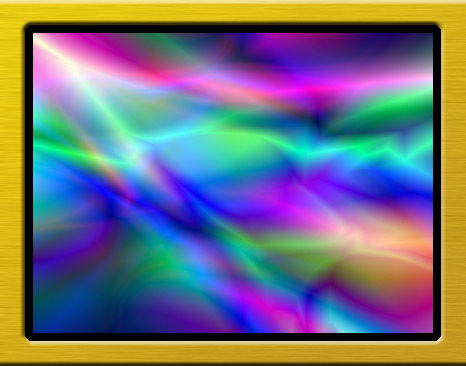
Make a Brushed Metal FrameYou can enhance the look of your artwork and digital photos by adding a nice frame to them. In this tutorial, we'll learn how to make a brushed metal frame. This easy tutorial will also teach you other useful Photoshop techniques. Here's what you'll be making:
|
| |||||||||||
1Start with whatever artwork or digital photo to which you want to add a frame border. For this example, I just made a quick piece of artwork using the psychedelic background tutorial. Here's my starting point:
2Decide how thick you want the frame border to be. I picked 25 pixels for the width of the frame, plus I'm going to add an inlay which will be 8 pixels wide. So the total width of the border on each side will be 33 pixels. We need to make room for this, so we'll expand the size of the canvas. Since the border will be on all four sides, we need to double the border width and add it to both the height and width of the canvas. Select Image->Canvas Size and add 66 pixels to both the height and the width. Make sure the center anchor position is selected and click OK. You'll now have some empty space around the image to hold the border:
3Create a New Layer to hold the frame. I going to make a gold metal frame, but you can use other colors. To add a little variation to the frame, we'll use a gradient. To make a nice gold, I used #edca09 and #c49a1a for the foreground and background colors. Select the Gradient Tool
I swiped the gradient diagonally from the upper left to the lower right and got this nice look:
|
||||||||||||
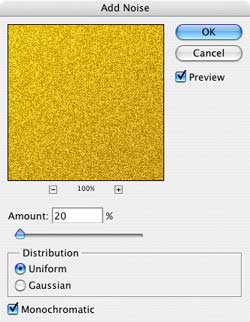
4Two quick steps are required to make the brushed metal look. The first is to add noise. Select Filter->Noise->Add Noise. An amount of about 20 works well. Here are the settings I used:
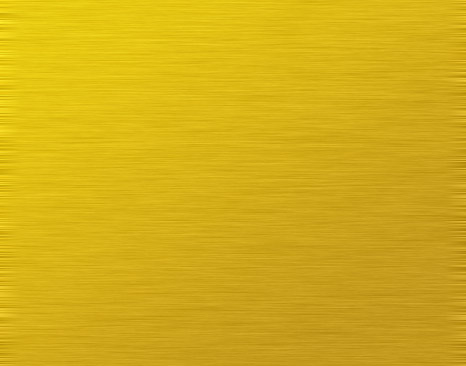
5Now we need to give it the brushed look. That will be done with motion blur. Select Filter->Blur->Motion Blur. Set the angle to 0 and the distance to about 40. Here's the result:
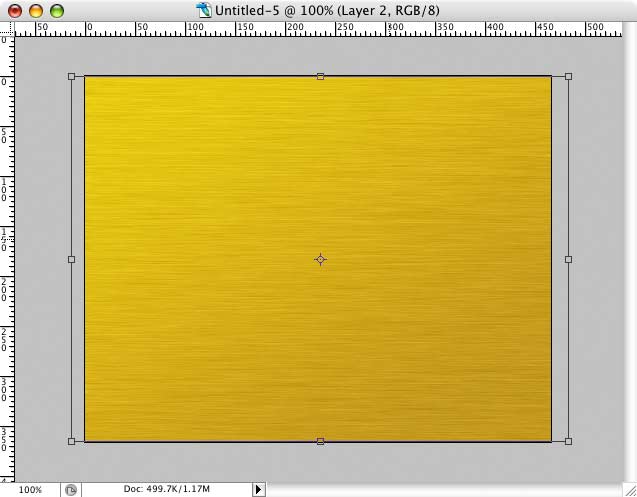
6The result of the motion blur is quite good, though notice that the filter leaves the left and right edges looking a little different from the interior portion. I don't want that look on the edges, so let's get rid of it. First, expand the size of your window a bit so you can see the gray area Photoshop puts around the canvas. Then select Edit->Transform->Distort. Grad the left side handle and move it a little to the left so that the funny looking edge is gone. Do the same with the right handle. It should look like this:
Hit return/enter to commit the edit. |
|
|||||||||||
|
|
||||||||||||
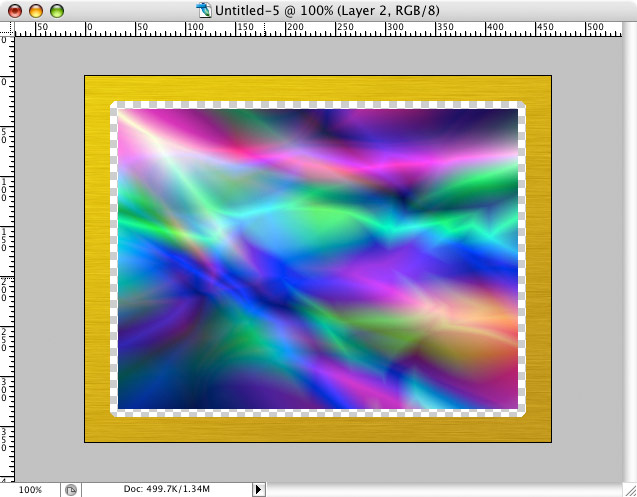
7Next we need to knock out a hole so our artwork on the bottom layer can show through. This is easy. All we have to do is to create a selection that matches the size and location of the artwork. In Photoshop, we do this holding down the cmd key (or cntl key on Windows) and then clicking on top of the thumbnail image in the Layers Palette for the layer holding the artwork. When you click on a layer's thumbnail image, Photoshop creates a selection that includes all the non-transparent pixels in that layer. This is a very handy feature. As I mentioned back in Step 2, I also intend to add an 8 pixel inlay, so we need to make room for that as well. We'll want the hole to be 8 pixels bigger all the way around, so choose Select->Modify->Expand and enter 8 pixels. This gives us a selection that matches the hole we wish to create in the layer containing the brushed metal surface we just created. Make sure that layer is still selected and hit delete to remove the pixels from that layer. Then deselect with cmd-D (cntl-d on Windows). Your image should look like this now:
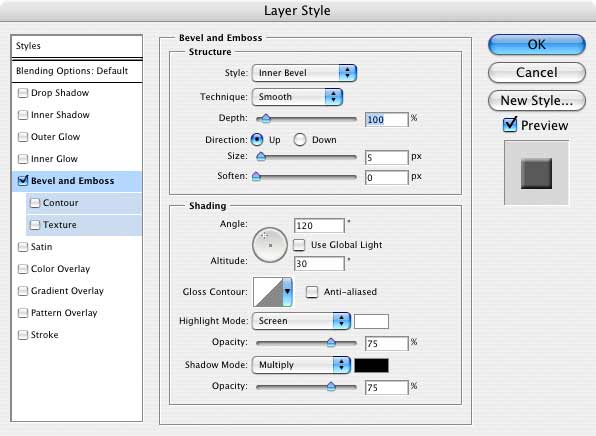
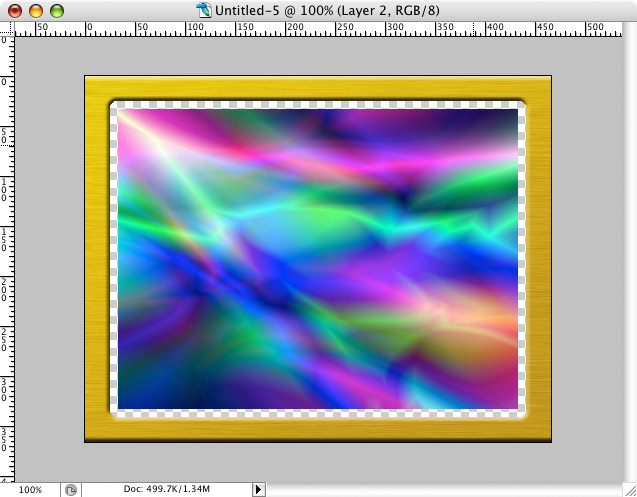
8We'll give the frame a 3D look with a Layer Style, starting with Bevel and Emboss. So select Layer->Layer Style->Bevel and Emboss and make these settings:
Which gives us the following result for the frame:
9Lastly, we'll add an inlay using the Stroke feature in the Layer Style. Below are the settings I used. I used black for the color, but you can use any color you want.
And here's our final result:
Remember, you can make any color metal frames with this technique. For silver, use two shades of gray instead of yellow. For copper, use two shades of brown, and so on. |
||||||||||||
Thanks for visiting with the Photoshop Dragon.
Copyright © 2007-2010 Curt Schimmel. The contents of this web site may not be copied in any way without permission. Terms of Use and Privacy Policy. |